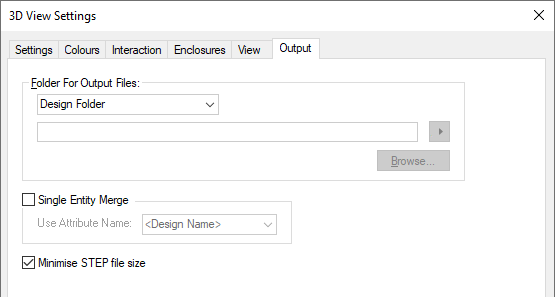
The Output dialog is used to refine selections used when exporting the STEP file.
Shortcuts
Default Keys: None
Default Menu: 3D Design
Command: 3D Settings Output
Locating this option
Available from: (design) 3D Design menu > 3D Settings> Output tab
Available from: (3D Viewer) 3D Design menu > 3D Settings> Output tab
Using the dialog

Folder For Output Files
This section defines where the STEP files are written when they are output.
You can choose from four different settings by selecting from the drop-down list.
- Design Folder : STEP files will be written to the same folder as the design file itself. If the design has not been saved yet, or the report is not design specific, the report will be written to the general folder. (See General Folders).
- This Folder : You specify the folder where STEP files are written. If you type a relative path it will be applied to the current working directory. You can use the pop-up menu to the right of the folder name box to insert keywords that will be replaced with the correct text when the STEP file is generated. These keywords are explained in the Folder Template section below.
- This Folder below design file : you specify a folder name which will be appended to the folder in which the design is stored. For example, if your design is stored in “C:\My Projects\Board 6\Revision 2.pcb”, you can set the STEP folder name to “STEP” and all the design’s report files will be written to the folder called “C:\My Projects\Board 6\STEP”. You can use the pop-up menu to the right of the folder name box to insert keywords that will be replaced with the correct text when the STEP file is generated. These keywords are explained in the Folder Template section below.
- General Folder : STEP files will be written to the general folder. (See General Folders).
Folder Template
Type fixed text into the box and use the drop down menu button to the right of the folder name box to insert keywords that will be replaced with the appropriate text when a STEP file is output. The first set of keywords, above the menu dividing line, are only inserted once and therefore show a tick on the menu when inserted. Click on an inserted keyword in the menu to remove it from the template. The keywords below the line can be added multiple times and so do not show a tick when inserted, and have to be removed by editing the template. The keywords you can use are described below:
-
Design Name : The name of the design the STEP file is being generated for.
-
Design Variant : The name of the Current Variant being used for the design. If variants are not being used, or the current variant is set to the master design variant, the keyword will simply be removed from the file name.
-
Design Type : The type of the design. This is the default file extension text, so “pcb” for a PCB design.
-
Date and Time - The Date or Time when the file is produced. The format used is the short form of the system time format, but with all special file path characters replaced with a dash character.
-
Design Attribute : Use this to insert the value of a design level attribute into the filename when the STEP file is generated. If the attribute does not exist, or its value is empty the keyword will not be used and will be removed from the name. Choosing this keyword from the menu will add ”$(ATTR)” to the template, where “attr_name” must be replaced in the template with the name of the attribute you want to use.
e.g. If the design has an attribute “JOB_NO” with the value “1806”, then ”$(ATTR)” will be replaced with “1808” in the name.
-
Start Pre-Text and End Post-Text: Most keywords are obvious, but the ”$(PRE)” and ”$(POST)” keywords are a little different. They are used to add text either side of another optional keyword, but only if it is not blank. So if the optional keyword has a value then the text between the pre-text keyword and the optional keyword will be included and the text between the optional keyword and the post-text keyword will be included. If the optional keyword results in blank text the pre-text and post-text keywords, and all text between them, will be removed from the name.
For example ”$(PRE)[$(Variant)]$(POST)” will be replaced by “[USA]” for variant “USA” and will produce nothing no variant.
-
If Then Else: There is also a set of advanced keywords that can be used to create conditional folder templates. For example to have completely different folders for each of the different design types. The following keywords are added from the menu item as a combined set, but they can also be inserted by hand. If the full set is added from the menu you have to replace each “xxx” text with your own text or keywords:
$(IF) $(MATCHES) $(THEN) $(ELSE) $(ENDIF)
If the text following the ”$(IF)” keyword matches the text following the ”$(MATCHES)” keyword, the text following the ”$(THEN)” keyword will be included in the name, otherwise the text following the ”$(ELSE)” keyword will be included. There must always be a ”$(ENDIF)” keyword at the end of the condition. Using ”$(MATCHES) allows you to use wildcard characters in the text following it, but you can replace it with keywords ”$(=)” or ”$(!=)” to test exactly equals or not equals respectively. Note: nested conditions are not allowed, i.e. an ”$(IF)” keyword should not be placed inside another ”$(IF) … $(ENDIF)” sequence.
For example, for design “myDesign.pcb” with design level attribute “Issue” with value “V02” the following template ”$(DesignName)-$(IF)$(DesignType)$(MATCHES)PCB$(THEN)$(ATTR)$(ELSE)Drawing$(ENDIF)” will produce “mydesign-V02” for a PCB design and “myDesign-Drawing” for a schematic design.
Single Entity Merge
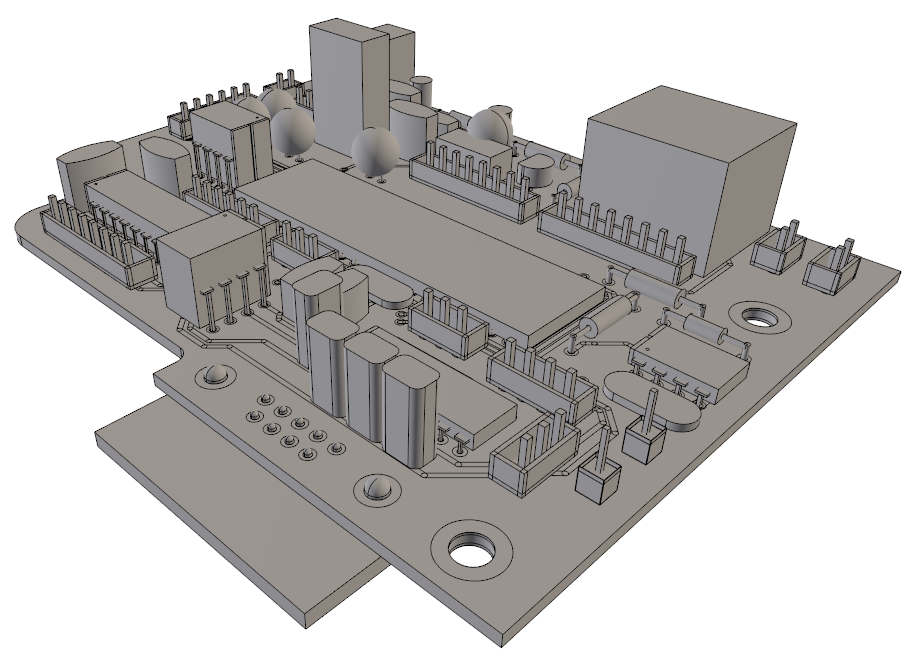
Select the Single Entity Merge check box if you wish to export your design as a single entity, (a normal STEP file would be multiple entities of each individual item).
Use Attribute name can be defined to use an attribute to name the resultant merged shape in the
STEP file. So if you use
This switch applies to both the external output to a file and when using the built-in 3D Viewer.

Note, the colour of the entity or individual items within it cannot be changed.
Minimise STEP file size
Selecting the Minimise STEP file size check box reduces the size of the generated STEP file by omitting non-essential parametric curve data. This is set on by default.
Related Topics
3D Settings | 3D Colours | 3D Interaction | 3D Enclosures | 3D Layers | 3D View | STEP Library | Write STEP File