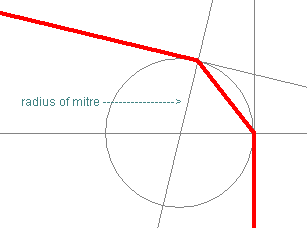
A Mitre or Fillet is used to round off sharp corners and can be inserted into any type of shape, shape cutout, PCB track or schematics connection. A mitre is a straight line across the corner, and a fillet is a curve to produce rounded corners.
Shortcuts
Default Keys: None
Default Menu: None
Command: Mitre Corner
Locating this option
Available from: Context menu > Mitre Corner option
Adding Mitres and Fillets
There are multiple ways of adding mitres or fillets into corners as follows:
- Use the interactive Edit Mitre option to drag a corner into a mitre or fillet. This is described in more detail below.
- Use the single shot Mitre Corner and Fillet Corner options to convert an any angle corner into a mitre or fillet by specifying the required radius. There is also an Unmitre Corner option to quickly remove a mitre. These options are also described in more detail below.
- Add the mitres or fillets automatically when adding segments to shapes or tracks by using the Orthogonal (Mitre), Orthogonal (Fillet) and 45 Angled (Fillet) modes.
- If the shape is a PCB Track, you can use the various Auto Mitre options on all the selected segments. This can add any angle mitres and includes commands to remove all mitres as well. The option will only add mitres or fillets if they do not create design rule errors.
Single shot Mitre Corner
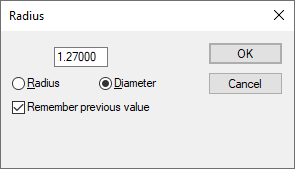
You can select a single corner, mitre or fillet and use the Mitre Corner or Fillet Corner options from the shortcut menu. This is a single shot operation, but has the advantage that any angle corners can have a mitre or fillet generated. A dialog will be presented as follows:

Type the value for the radius or diameter of the mitre or fillet to be created. This is the radius of the circle that is tangent to the two lines that meet at the corner.

You can remove any fillet or mitre back to a sharp corner by selecting it and using the Unmitre Corner option from the shortcut menu.
How To Edit A Corner To Create A Mitre
Use the Edit Mitre option to drag a corner between two segments to create a mitre or fillet of any size.
Choose to allow creation of mitres or fillets between straight line segments with any angle between them, or to only allow mitres or fillets between orthogonal segments. Do this in either the Options - Edit Track or Options - Edit Shape dialog.
-
Select the corner at the orthogonal intersection on the shape into which you wish to insert the mitre using Select Mode or Edit Mode. A small circle will appear at the selected intersection.
or
Select the existing mitre or fillet segment that you wish to alter.
-
Double click on the selected corner or segment, or right click and select Edit Mitre from the shortcut menu.
-
Using the cursor you may then drag the corner or existing mitre into a mitre of the desired size.

-
Whilst altering a mitre, you can use the Curved Mitre function on the shortcut menu to change it to a fillet, or back to a mitre again.
-
You can use the Enter Radius function on the shortcut menu to set the mitre offset to a specified size.

-
Whilst altering the mitre or fillet, you can use the Default Mitre Size function on the shortcut menu to finish the mitre by setting it to the mitre size defined in either the Options - Edit Track or Options - Edit Shape dialog.
Latch Mode
Edit Mitre can be used in latched Mode allowing you to mitre or fillet multiple corners by simply by picking each corner in turn.
Related Topics
Shape Editing Overview | Auto Mitre | Latched Mode | Options - Edit Shape | Options - Edit Track | Orthogonal Mitre