Use the Tools tab to add external tools, such as your text editor, launch other applications, run reports, run macros and run scripts while working in the integrated Pulsonix environment. You can specify arguments and a working directory when launching the tool.
Shortcuts
Default Keys: None
Default Menu: Tools
Command: Customise
Locating this option
Available from: Tools menu > Customise option
The Tools tab
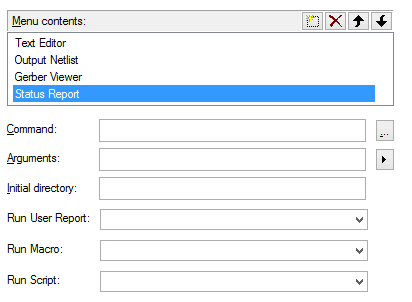
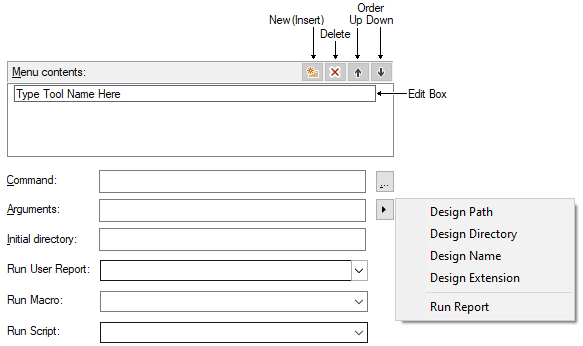
The Tools dialog is split to show Menu contents: created with the control buttons, and edit entry boxes for defining aspects of the commands to run.

Creating a New Tool Definition
The process for adding a new tool is as follows:
- Create a New item (press New)
- Type in your tool name in the Edit Box
- Use one of the options to define the tool to be assigned
- Provide arguments for the tool (if required)
- Edit this page and add the tool to a Menu or Shortcut key
Tool Definitions

Menu contents:
Use the New (Insert) button to add a new tool. This will add an empty entry at the end of the list, ready for the name of the new tool to be entered using the Edit box. Complete the new tool name by pressing the Enter key which will then allow the tool details to be added below. The new tool name will subsequently appear in the User Tools menu when it is next displayed.
Select an entry in the list to change its tool details.
Use the Delete button to remove a tool from the list.
The order in the list is the order the tools will be presented on the User Tools sub-menu on the Tools menu. Use the Up and Down arrows buttons to re-order your tools.
Command entries
The Command box is used to provide the name of the application to be run. Enter the path to the .exe, .com, .bat, .cmd, or other file that you intend to launch.
Use the … browse button to find the required file using a standard file browser.
Use the Arguments box to provide any command line arguments that you need to send to the program when launched.
Use the ”>” button to the right of the argument edit box to drop down a list of plug in arguments. The chosen plug in argument will be added to argument field at the current cursor position. This argument will be expanded when the tool is run to contain the relevant information. In the example above the command line is “MyGerberViewer $(DesignDirectory)$(DesignName).gbr”. When the tool is run the command line will be changed to include the current design. e.g. “MyGerberTool, c:\myfolder\board1.gbr”.
Use the Run Report argument to place the name of the user report file (specified below), into the command arguments to be used to launch the tool.
Use the Initial Directory box to specify an optional working directory for the tool.
The Run User Report field allows you to select a user report from the drop-down list to run before the tool is launched. If you leave the Command field blank, only the user report is generated. This is a way of putting your user reports on the User Tools menu and assigning shortcut keys to them.
By using the Run Report plug in argument with your tool, you can write a user report to generate the format required by your tool and automatically generate the report prior to running the tool and pass its filename as an argument to it.
The Run Macro and Run Script fields allows you to select a saved macro or script respectively from the drop-down list to run when the tool is launched. If you leave the Command field blank, only the macro or script is executed. This provides a method of putting your saved macros and scripts on to the User Tools menu and assigning shortcut keys to them.
Customise Dialog Tabs
Tools tab (this page)