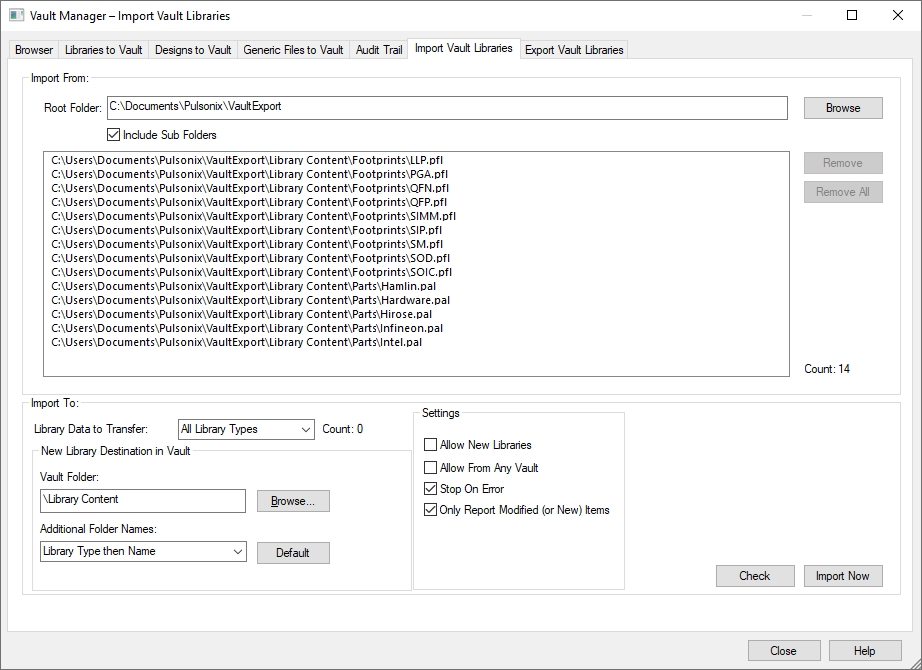
The Import Vault Libraries page of the Vault Manager dialog allows all or some of the exported library data from the Vault to be checked back into the Vault, in a single operation.
Note: Not importing a full set of changes may mean reloads later. Any modified library items, referencing or referenced by other library items e.g. Footprint or Symbols, not imported at the same time will have to subsequently reload those referenced items before they will be able to be checked into the Vault.
The is a licensed feature that should be added to your main Pulsonix license. If you require this feature, please contact your local sales office.

Import From
Use Import From: to specify the Root Folder of where the libraries to be imported are. This will be a Windows source folder for the existing exported libraries. This must be a readable location and not protected (such as where the Pulsonix program is located). This can be across a network.
Select the Include Sub Folders check box if you wish for the library data to be imported from the selected folder and all of its sub folders.
Import To
Use the Library Data to Transfer drop down box to select the library type that you would like to import from the list of files above. To import all types, select All Library Types. The number of libraries of that type that will be imported from the list is displayed to the right.
New Library Destination in Vault
Use the Vault Folder browse button to specify the where in the Vault any new libraries will be stored.
Use the Additional Folder Names drop down box to specify additional folder names to be used on new items.
Settings
Tick the Allow New Libraries option to allow the import of libraries that are not currently known by the Vault.
Tick the Allow From Any Vault option to allow the import of libraries that are from a different Vault.
Select the Stop On Error option to stop and report when the import finds an error.
Select the Only Report Modified (or New) Items check box to specify how much of the imported items will be reported. Unchecking this will report everything.
Importing the libraries
Press the Check button to simulate the results of importing without actually importing the libraries. A report of the results will be generated and displayed once complete.
Press the Import Now button to start importing the library data.
The selected library types found from the selected root directory and sub directories (if chosen) will be checked into the Vault to their appropriate libraries. If the library being imported currently exists in the Vault, then the current Vault copy will be replaced by the one being imported. If the library is new to the Vault, then the library will be placed in the directory
Running Import from the Command Line
The VaultImport command is available for a Pulsonix Command File within the Pulsonix PLM option.
Optional parameters allows for the override of the options specified from within Pulsonix. By running Pulsonix from the command line with a Pulsonix Command File as a parameter, the Vault Library Import facility can be utilised from the Windows Scheduler to create a regular reoccurring task. The full recommended command line is shown below:
Pulsonix.exe -hidden -commandfile <path to command file>
More information about the PLM option can be found here and on the Pulsonix web site.
Related Topics
Vault Manager | Libraries to Vault | Designs to Vault | Generic Files to Vault | Audit Trail | Import Vault Libraries | Export Vault Libraries