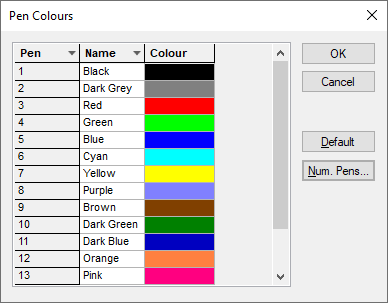
Use this dialog to tell the application the colour of each of the pens in your HP pen plotter. When selecting a pen during generation of a plot, the application will attempt a “best match” between the colour in the design and the colours defined here.
Locating this option
Available from: Output menu > CAM Plots > Plot Settings > Setup - HP-GL - Penplot > Pens button
Using the dialog

To change the colour of a pen, click on the coloured bar in the list, and choose a new colour from the drop-down list. For example, if pen 2 in your plotter’s pen carousel is red, choose red from the drop-down list alongside pen 2, and all red items on the next plot you generate will be plotted using pen 2.
Once a list of pens has been defined, these are saved with the design and form part of your technology settings.
Use the Default button to reset the current list back to the built-in system set of pen numbers and colours. A confirmation dialog is displayed before resetting the list.
To change the number of pens available on your plotter, click on the Num Pens button to display the Number of Pens dialog. You should do this if you change your plotter for one with less pens, otherwise the output files you generate may still use pen numbers larger than your plotter can handle.