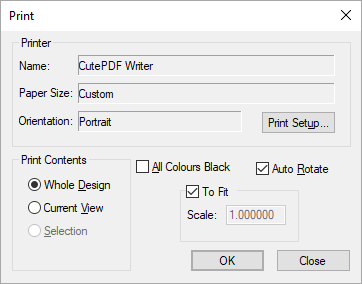
The Print option, available from the File menu and the standard toolbar, provides a quick alternative to using CAM Plot output, and when selected will display the Print dialog.
Shortcuts
Default Keys: Ctrl+P
Default Menu: File
Command: Print
The Print Dialog

WYSIWYG Printing
Printing within this dialog is WYSIWYG (what you see is what you get). Whatever is displayed on screen in terms of contents is what will get printed. If you wish to have more control over the printing, you can also print through the Plots dialog on the Output menu.
Printer Name
This part of the dialog shows information about the currently selected Windows printer. To change to a different printer, or change the properties of this printer, click the Print Setup button to access the standard Windows Print Setup dialog.
Print Contents
You can choose to print the whole design, the current view, or just the currently selected items. For multi-sheet schematics, you can also choose to print all the pages (one sheet per page). The print will be automatically scaled to best fit the current paper size.
Only design items currently displayed on-screen will be printed and by changing the currently visible items, using the Colours dialog, you may control what appears in the printed output.
All Colours Black
By leaving this option unchecked you can choose to print in colour (grey scale for non-colour printers), otherwise the checking the option will print with All Colours Black (no grey scale).
Auto Rotate
With this option checked the print will always be auto-rotated to best fit the currently selected paper orientation. Unchecking this option will allow a landscape design or view to be printed on to portrait orientated paper or vice-versa.
To Fit & Scale
With this option checked the print will always fit the printed area to the paper size. Unchecking this option will allow you to enter a plot Scale (1.0 being actual size, 2.0 being double actual size). Note that scaling does not guarantee that the plot will fit the paper.