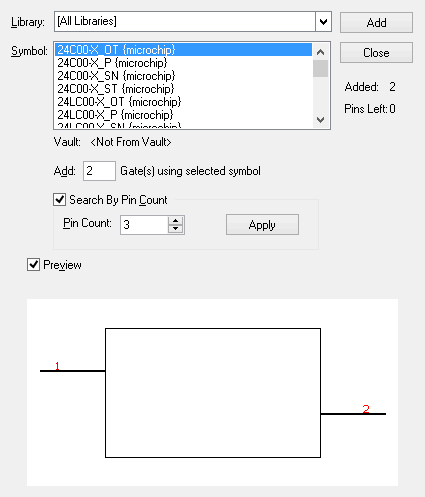
Use the Insert Gate dialog to insert one or more gates into the part.
Locating this option
Available from: Library Manager option > Edit button > Parts tab > Insert menu > Gate option
How to Use This Dialog
The dialog displays a list of Schematic Symbols which can be used for gates in this part. Select the symbol you wish to use, and press OK to add it to the part. The counts shown just below the “Cancel” button are updated as you add each gate, showing how many gates have been added and how many pins on the part are currently not assigned to gates.

To view the symbols in a particular library, select the desired library from the Library drop-down list. The symbols can also be “filtered” by their number of pins. To do this, check the Search by Pin Count check box, enter the desired number of pins, and press Apply. The list of symbols will be updated to show only those symbols that have the specified number of pins. Use Preview to switch on/off a preview of the currently selected symbol.
If the Vault is in use, the Vault field, displayed just below list of symbols, will show the vault ID, Revision and Version information.
Related Topics
Parts Editor - Gates Page | Change Gate Symbol | Change Gate Order