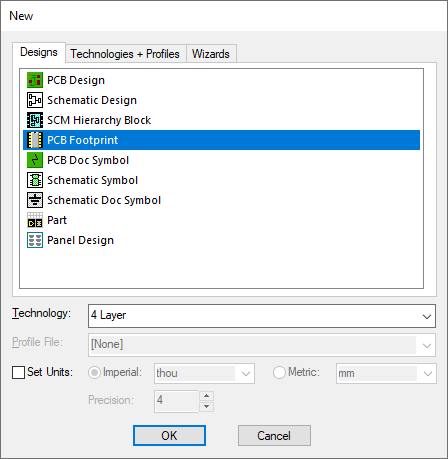
From the New dialog, a PCB Footprint editor session will begin. From this dialog you can also specify the Technology file to be used to give you the basics of a new footprint.
Shortcuts
Default Keys: None
Default Menu: File
Command: New
Locating this option
Available from: File menu > New > Design tab PCB Footprint
Creating a new PCB Footprint
Using the New option from the File menu select PCB Footprint

By clicking PCB Footprint the Technology file selection is activated.
In Technology you may select an appropriate existing Technology File. See also PCB Technology. If there are no Technology Files created as yet you may select None. In this case the Technology used will be a default set of text styles, track widths, spacings, layers, etc. These parameters may be edited for this particular design and then saved as a new Technology File.
The Profile File option is not available (or relevant) for a new footprint.
Use the Set Units check box to define your Units and Precision overwriting the units defined in the Technology File selected.
Choose between Imperial and Metric units by selecting the relevant radio button. Choose the unit type next to the units selection.
Click OK and the PCB Footprint Editor window will open.
Once the design session has started the technology can be edited and saved at any time if required. This simple process saves downstream time for future designs where the start point has already been created.
This new session is ready for the creation of a new footprint using the basics of Pads, Shapes, Text and Attributes. To assist Footprint creation, you also have the Footprint Wizard which simplifies and automates the Footprint creation process for you.
Related Topics
New Dialog | Technology Files | PCB Technology | Technology Dialog | Footprint Wizard