The user interface in Pulsonix is logical and follows a left to right flow through your design process.
Framework
The main caption across the top of the Pulsonix product (the ‘framework’) displays a number of useful pieces of information:
- Product Name (Pulsonix)
- Application currently in use, for example, PCB Design, Schematic Design etc.
- Design Name in the example image below High speed
- Variant name in the example image below GB
- An asterisk * - this is displayed if your design has had modifications made to it but not yet saved.
Toolbars
There are a number of main toolbars in the user interface:
The Menu bar Toolbar or Main Menu, which contains all the headings for the main sub-menus and commands that drive the design process.

See Also: Menu bar
The Standard Toolbar containing many familiar Icons common across Windows applications but also, in the central section, all the Icons relating to the key features of Pulsonix: Libraries, Technology, Data Transfer, Options, and Reports.

The Edit Toolbar containing Icons associated with the Edit function : Select, Select Edit, Select Next, Properties, Move, Rotate, Mirror, Lock / Unlock.

The PCB Toolbar and Schematics Toolbar (both only part shown ) contain buttons associated with the specific design functions in PCB and Schematics.
 |  |
As you see, they comprise of easy to understand Icons with industry standard tooltips as you move the cursor over the Icon. All these Toolbars can be customised and repositioned. You may also add your own Toolbars.
See also: Toolbars and Customise
Workbook Mode
Workbook Mode presents a set of tabs along bottom of the view screen each of which is a currently open design. This enables you show the open designs and to quickly switch between designs.

How To Open Workbook Mode
On the Main Menu under View click Workbook Mode
How To Close Workbook Mode
On the Main Menu under View click Workbook Mode
See also: Workbook Mode
The Status Bar
Visible at the extreme bottom of the design window, the Status Bar gives an immediate set of essential property information relating to the design item currently selected or being edited, without the need to access the item’s property information.


How To Open The Status Bar
On the Main Menu under View click Status Bar
How To Close The Status Bar
On the Main Menu under View click Status Bar
See also: Status Bar
The Application Look
It is possible to tailor the look of the Pulsonix user interface to match the particular style of interface with which you are familiar. This can be done easily using the Application Look dialog.
Browser Windows
World View

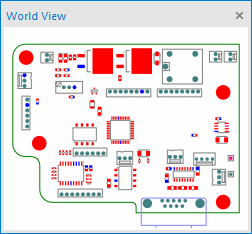
The World View gives a complete view of the design showing the area within the overall design occupying the design window. You may also manipulate the graphics within the World View by framing areas to zoom in/ zoom out and zoom in/out within the World View with the mouse wheel.
How To Open The World View
Use the shortcut key ‘w’ or on the Main Menu under View click World View
How To Close The World View
Use the shortcut key ‘w’ or from the View menu, select World View or click the close symbol in the top right corner of the World View Window.
Component Bin and Preview Window

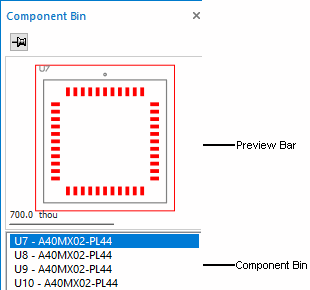
The Component Bin and Preview Window provides a useful place to keep all your unplaced components ready to insert into the design. You may then select the component to place by clicking the name in the bin, or the preview image, holding down the mouse key and dragging it into the design window.
How To Open The Component Bin And Preview Window
Use the shortcut key ‘b’ or from the View menu, select Component Bin.
How To Close The Component Bin And Preview Window
Use the shortcut key ‘b’ or on the Main Menu under View Component Bin or click the close symbol in the top right corner of the Preview Window.
See also: Component Bin
The Design Browser
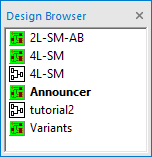
The Design Browser is displayed as a configurable Dockable Window containing a list of all the currently open PCB and Schematic designs, technologies and profiles.

How To Open The Design Browser
On the Main Menu under View click Design Browser
How To Close The Design Browser
On the Main Menu under View click Design Browser or click the close symbol in the top right corner of the Design Browser.
See also: The Design Browser Window
DRC Errors Browser

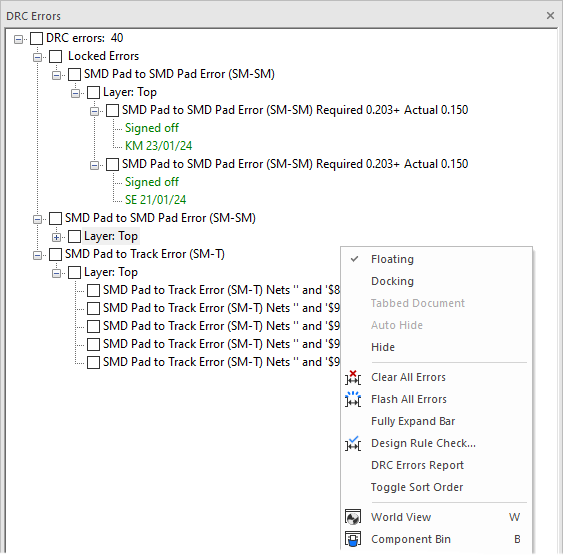
The DRC Errors Browser enables you to view the complete list and location of all the errors found by the batch DRC check. You may them merely click on the X & Y coordinate locations to immediately zoom to the precise location in the design window so as to correct the error and eliminate it from the list.
How To Open The DRC Errors Browser
On the Main Menu under View click DRC Errors
How To Close The DRC Errors Browser
On the Main Menu under View click DRC Errors or click the close symbol in the top right corner of the DRC Errors Browser.
See also: The DRC Errors Browser
Related Topics
Menu bar | Toolbars | Customising Toolbars | Workbook Mode | Status Bar | Application Look | World View | Component Bin | The Design Browser Window | The DRC Errors Browser | Dockable Windows