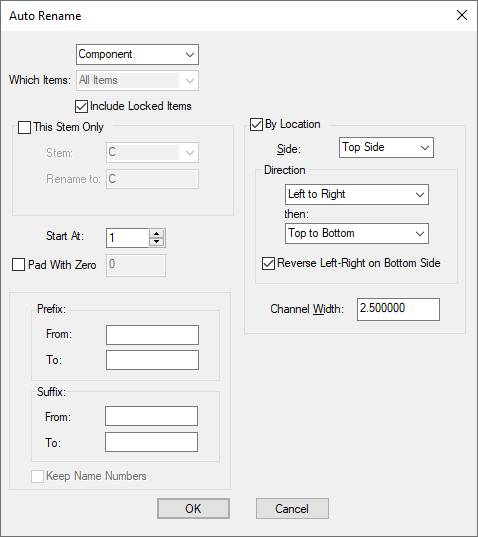
Automatic Rename is used to re-sequence the numeric order of the names of Components, Test Points and Nets. This page documents the renaming of items in PCB designs, for schematic designs see Schematics Auto Rename.
Shortcuts
Default Keys: None
Default Menu: Tools
Command: Auto Rename
Locating this option
Available from: Tools menu > Auto Rename option
How to use Auto Rename

Type
Use the drop down list at the top of the dialog to select the type of items to rename (Components, Nets or Test Points).
The names of items normally consist of an alphabetic stem followed by a number. Auto Rename adjusts the numbers for a stem into a consecutive sequence.
For example a group of resistors could be named R1, R3, R5. Auto Rename would cause the resistors to be renamed R1, R2, R3, closing any gaps in the sequence.
Include Locked Items
Select this check box if you wish to include or exclude locked items from being renamed. Note, nets cannot be locked.
This Stem Only
You can choose Which Items to rename by using the current selection. You can rename just the selected (or unselected) items. Of course, those items which are renamed will not use names already used by those outside the selection.
You can choose to rename all items by leaving This Stem Only unchecked, or select a specific name stem by checking this option and selecting a stem name from the drop down list. You also have the opportunity to change the stem by typing a different string into the Rename To box.
Start At
Use this to start the rename at this number. This enables you to start mid way through a sequence if required.
The number can be padded with zeros, to make the new names have a fixed length. This can be done by checking the Pad With Zero box and setting a value. For example, setting the padding to 4 would rename a resistor to R0001.
Prefix and Suffix
You can specify a Prefix or Suffix and you can change these strings From the specified value To a different one. For example, ‘U1_ADD1’ with Suffix from ‘_ADD1’ to ‘_ADD2’ would give ‘U1_ADD2’.
When enabled, the Keep Name Numbers switch means only the Prefix and Suffix will be renamed and all other names and formatting will be preserved.
This option is only available if not doing This Stem Only or By Location. This option is used when using Auto Rename to change the Prefix or Suffix and in that case, not allocate new numbers (which is how Auto Rename normally behaves).
By Location
You can rename Components or Test Points by location by checking the By Location box. This enables you to produce a name sequence based on the physical location of these items on the board. This style of rename is commonly used for the service engineers convenience when attempting to diagnose problems on the board and using a schematic diagram as reference.
If the design contains a board outline the items must be inside it otherwise they will not be renamed. If the design does not contain a board outline the option will use the design extents.
See the By Location Options below for details of how to rename by location.
Any changes made to the PCB following a rename can be back annotated to the associated schematic design. If changes have been made to the PCB and a Synchronise Designs is performed, these changes are flagged for your attention and a back annotation can be performed.
If you only want to rename specific items, you might want to consider using manual Rename.
By Location Options
The By Location Options page will provide you details about each of the options available.
Type | Components | Side | Rename Direction | Location | Reverse | Channel Width