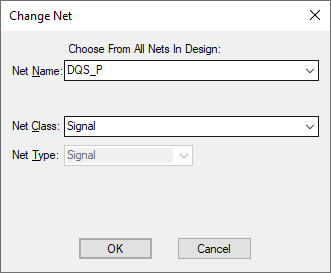
Use this to change properties of the net that the selected design item is on. You can change its name or net class, or merge it with another net.
Note: Use the Split Net option to split some items from their net into a separate net.
Shortcuts
Default Keys: F2
Default Menu: None
Command: Change Net
Locating this option
Available from: Context menu > Net > Change Net option
How to Change A Net
If not already editing a Connection or PCB Track, select a design item on the required net using Select Mode or Edit Mode. Right click to use the shortcut menu hover the mouse over Net and then select the Change Net option.
The Change Net dialog will be displayed as follows:

Net Name
The dialog shows the existing Net Name on the selected net. This can be changed by selecting a name from the list compiled from the Net Names in the design’s Technology data, or you can type a completely new net name.
Normally this option is used to change the net’s name to a new unique name, but by selecting an existing net from the list, the two nets will be joined, with the complete net keeping the chosen name. Before merging the nets, the following dialog will be displayed:
When used on a Template or Copper, you can choose to Only List Nets Within The Shape (Meaning nets with an electrical item contained or crossing the shape).

Press OK to join the nets, or choose to cancel the operation.
Net Class
You can use the Change Net dialog to change the net class that the selected net uses. This can be changed by selecting a name from the list compiled from the Net Classes in the design’s Technology data.
Change Name Of Sub Net Only
You can change the net name of a sub net, splitting the net. In Safe Mode, the sub net should not contain any component pads.
Related Topics
Edit Mode | Net Classes | Net Names | Net Properties | Select Mode | Split Net