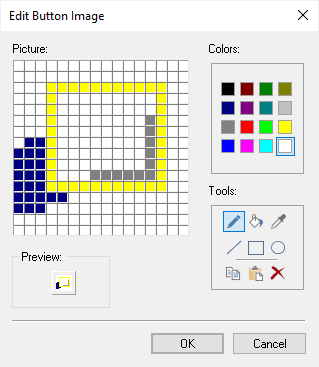
This dialog is an image editor used for changing a user defined image on a button in a toolbar or menu.
Locating this option
Available from: Tools menu > Customise option > Right Click on toolbar icon > select Button Appearance
Using this option
It is accessed by pressing the Add or Edit buttons on the Button Appearance dialog.

Select a colour and a tool and click or drag on the picture to alter the picture. A real size preview is shown to view the image as would be seen on a toolbar. The tools available are from left to right, top to bottom:-
Draw - Click on a pixel in the picture to change it to the selected colour. Drag to change the colour of all pixels the cursor crosses.
Fill - Use to fill an area of the picture with the selected colour.
Dropper - Click on a pixel in the picture to select its colour in the colour palette. The Draw tool will be selected ready to use this colour.
Line - Drag on the picture between the two pixels you want the line between, to add a line using the selected colour.
Rectangle - Drag on the picture between two pixels that define opposite corners of the required rectangle.
Oval - Drag on the picture between two pixels that define opposite corners of a rectangle that encloses the required oval. Use a square to add a circle.
Copy - Copies the whole image for use when creating other images.
Paste - Changes the whole image to the image previously copied.
Delete - Clears the whole image.