With the Group operation, multiple items can be put into a named group. The grouped items can be selected as one and optionally act as one item when using some operations such as moving and rotating. Groups, unlike selections , are saved in the design and can be transferred from Schematics to PCB.
Groups can be Tight or Loose. Selecting an item in a Tight group will automatically select all other items in the group, so most operations acting on the selection will always act on the whole group. This is very useful, for example, for selecting placed clusters of components for moving as one to another part of the board. An item can only be a member of one tight group.
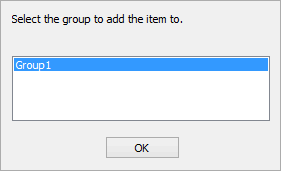
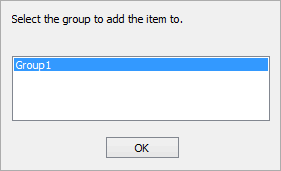
Selecting an item in a Loose group does not automatically select any other members of the group. Items in the group can be moved independently from other members of the group. This is really just a way of linking a set of items, with a relevant name, such that they can be selected together using the Select Group or Find operations. This is useful method for a Schematic Designer to link associated items so that they can be easily found in the PCB Design at a later stage. Items can be a members of many different loose groups. If a group operation is run on an item in several loose groups, the following dialog will be shown to choose the correct group for the operation.

In a loose group you can set one item to be the group master item using the Group Master Item feature. Moving this item will select and move all members of the group, other items can be moved independently. This allows flexibility by providing Tight group move functionality for a single item in an otherwise Loose group.
Groups are defined in a Design Context, this is normally the current design type (PCB or Schematic), but can be All Designs meaning it will be passed forward from Schematics to PCB.
Shortcuts
Default Keys: None
Default Menu: Context menu
Command: Group
Default Keys: None
Default Menu: Context menu
Command: Add To Group
Locating this option
Available from: Context menu > Group option
How To Group Items
With more than one item selected, right click and use the Group option from the shortcut menu. Selecting this option causes all the items to be added to a new group. The following dialog will appear for you to name the group.

The name entered must be an unique name within the design. Check the Tight Group box if the group is to be tightly grouped, i.e. items cannot be moved independently from one another.
Latch Mode
Groups can also be created using the Group option in a latched mode of operation. To do this the Group tool must be placed on a toolbar using the customise function. Then select this tool with no items selected. The cursor will change to indicate you are in latch mode.
Either frame select a set of items to directly group them, or select each item with the Ctrl key pressed down to build up the selection and click on one of the selected items with the Ctrl key back up to put them into a group.
When the group is defined the Name Group dialog will be displayed. Press OK to add the group to the design and start creating the next group until the operation is cancelled.
How To Select A Group
To select a whole tight group simply select one of its members. To select a whole loose group, either select an item in the group and use the Select Group option from the shortcut menu, or use the Find operation detailed below. If the item belongs to multiple loose groups, the Select Which Group dialog will be shown for you to choose which group to select.
How To Add Items To A Group
To add an item to an existing group, select it and use the Add To Group… option from the shortcut menu. You will be presented with a dialog showing all of the groups in the design as follows.

Select the group you want to add the item to and press the OK button.
How To Remove Items From A Group
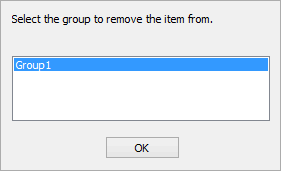
To remove a single item from an existing loose group, select it and use the Remove From Group… option from the shortcut menu. You will be presented with a dialog showing all of the loose groups the item is a member of as follows.

Select the group you want to remove the item from and press the OK button. If you want to remove an item from a tight group, first make it loose to remove the item, and then make it tight again.
How To Remove A Group
To remove a group, either select an item in the group and use the Ungroup operation from the shortcut menu, or use the Delete button on the Technology - Groups dialog.
Tight/Loose Groups
Groups are created by default as Tight groups, that is all members of the group act as one. If you want to make changes to individual members of the group, change the group type to Loose. This can be done by selecting the group and unchecking Tight Group on the shortcut menu. Any group member can then be operated on individually. To change back to a Tight group, select any member of the group and check the Tight Group option again. If the item belongs to multiple loose groups, the Select Which Group dialog will be shown for you to select which group to make tight.
Changing the Name Of A Group
To change the name of a group, either select an item in the group and use the Name Group option from the shortcut menu, or change the name directly using the Technology - Groups dialog.
Changing the Context of a Group
By default a group is only relevant to the design it was created in, so its context is SCM Design Only or PCB Design Only. Like Attribute Names, this context can be changed to All Designs meaning the same group will exist in the Schematic Design and its associated PCB Design.
Any components in groups that have the All Designs context in a Schematic Design will be added to the same named group in the PCB design after using the Translate To PCB operation.
Subsequent changes to the contents of these groups, or new groups of components added to the Schematic after the PCB has been created will be dealt with by the Synchronise Designs operation. The PCB will be updated to match the Schematics Design.
The group context can be changed in the Technology - Groups dialog.
Copying a Group
Groups will be copied only if all items in the group are copied. The copied group name will be incremented if it already exists in the design.
How Do You Know If An Item Is In A Group
The group name of selected items is shown on the status bar. If an entire group (and only that group) is selected then “Multiple Items” on the status bar is replaced with “Group: (name)”, otherwise the group name is added to the right of the status bar text. If the selected items contain more than one group, the main group is shown with three dots after it.
There is more information given if you use the Properties dialog on the selected items. A Groups tab is included in the dialog showing which groups the selected items are on. The groups dialog box is read only and shows if all selected items are in the group and also if the full group is selected.
You can also use Tooltips to show the groups that an item is in when hovering the cursor over it.
How To Find A Group
Groups can be found using the Find dialog and selecting Groups from the find category list. Select the group name you wish to find and the first item will be selected (or highlighted, you have the choice). If the group has a master item, it will always be selected first. Use the Find Next icon at the top of the dialog to cycle through the items in the group, or use Select All from the shortcut menu to select all members of the group. Note that single members of a tight group can be selected with this operation, but the whole group will be selected if you try to move it.
Related Topics
Group Master Item | Group Properties | Name Group | Find | Synchronise Designs | Technology - Groups | Translate To PCB | Ungroup