Pulsonix can be used in ‘workbook’ mode. The mode enables the design tabs to be displayed at the top or bottom of the design area. This allows fast switching between designs and other windows currently open within the Pulsonix application.

Shortcuts
Default Keys: None
Default Menu: View
Command: Workbook Mode
Use Ctrl+tab to toggle between open windows within Pulsonix, this is standard Windows functionality
How To Switch The Workbook Mode On or Off
- On the View menu, View > option, Workbook Mode
- The icon next to the name will denote whether the Workbook Mode is currently enabled. You may wish to toggle this mode off if you require the maximum working design area.
Using Workbook Mode
Tooltips
By moving the cursor over one of the tabs and pausing momentarily, tooltips are available for each tab. This will display the name of the design in full, the name will be truncated depending on the number of open designs and the space available to display the tabs. The tooltip will show the full name and the page if used on a Schematic design.
Context Menu Options
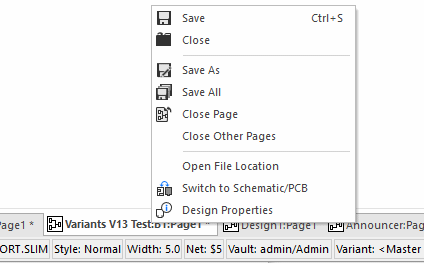
Each tab also has a context menu, accessed by right clicking the mouse. The Save in Library option is only available if the file being edited is from a library.

Workbook Tab
The asterisk (*) next to the name shows that changes have been made and the design needs saving before closing. The Workbook mode can be switched on or off depending on your preferences.
Without the workbook mode switched on, you can switch open designs and windows using the Windows menu and the Window list displayed at the base of this menu. Obviously the workbook mode is much quicker but also takes additional design area.
Repositioning The Workbook Tabs Top or Bottom
Use the Application Look dialog to change the Workbook Tab Location between the top and the base of the design area.
Changing The Workbook Tab Order
You can change the order of the Workbook tabs by the design area by picking and dragging them. You may wish to have all your schematic designs together for example.