This option is available only if you have the import Seica Netlist license feature on your Pulsonix license.
How to use Confirm Seica Netlist Changes
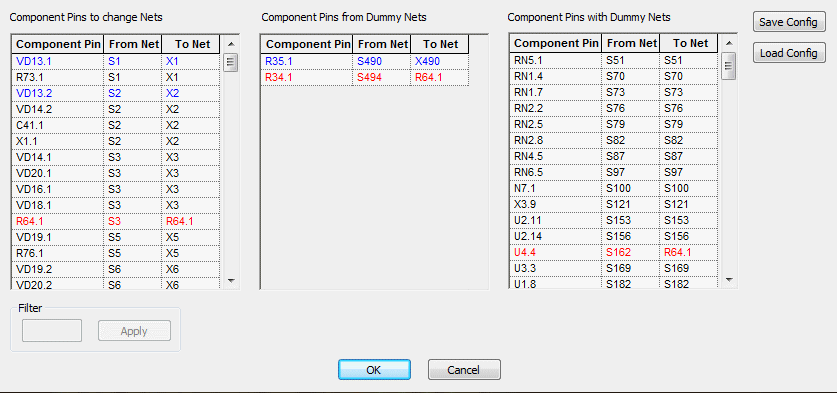
This dialog is opened when you have selected Confirm Changes when importing a Seica Netlist.

In general the whole netlist changes will be made. The grid on the left hand side lists all the real netlist changes that will be made.
The grid in the middle lists the single pin (dummy) nets that have changes in the new netlist.
The grid on the right hand side lists the single pin (dummy) nets from the netlist.
By double clicking a row in either the Component Pin or From Nets column this net node will be excluded from the netlist and the row will be highlighted in blue. If you double click in the To Net column the row will be highlighted in red. The To Net cell then becomes editable and you can change the net name to used for this pin. Double Clicking in any highlighted row returns the status to not highlighted. This works in all the grids.
If you can right hand click in any column a menu appears which allows you to Sort Column or Filter Column. If you select Filter Column then the Filter controls become active and you can select the name to filter on. When filtered if you right hand click on a cell then Remove Filter is available which will then change the grid to its full state.
At any time you can save the choices you have made by clicking Save Config and you will be able to browse to the configuration file to be saved.
Also you can load a saved configuration file by clicking on Load Config.