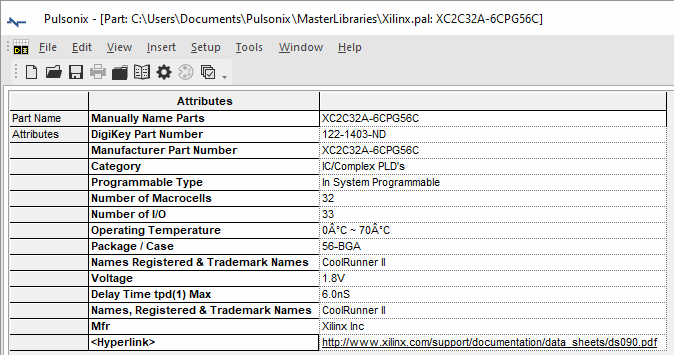
This page of the Parts Editor allows you to define the parts contained in this part group, together with the naming rules and the part attributes.
Locating this option
Available from: Library Manager option > Edit button > Parts tab > Parts & Attributes page
How to Use This Page

Part Name
The first column of the grid shows the Part Name. Click on the text to modify the name.
Attributes
The remaining columns of the grid show the attributes attached to this part. Add attributes to the part using the Insert Attribute option. This option is available from the main menu bar, the toolbar, or from the shortcut menu.
Attributes that are marked as No Override are drawn with a coloured background.
You can define default Part attributes which will appear in this list when a new part is created.
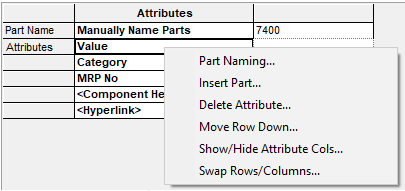
Swap Rows and Columns
If you prefer, you can swap the rows and columns in this dialog so that the Attributes list is shown vertically rather than horizontally. Do this by selecting the Swap Rows/Columns option from the context menu when right clicking in the Attributes grid. This might be more convenient if you are using a lot of attributes. This has no effect on the data stored in the part.

Part Groups
To save time when creating a number of very similar parts, you can group parts together into “Part Groups”. All the parts in a group use the same basic part information (footprint, gates, pin names, and so on), but they each have a different name. Each of these parts in a group are also known on some systems as part “aliases”.
These parts are then stored together in the library, and reloaded into the Parts Editor as a group when any of the parts in the group are opened for editing. In the example shown below, this group of parts in the 74 series of logic components contains three parts, which only differ in the part name.

Automatic Naming of Parts
Some groups of parts are so similar in their construction that it is possible to define rules for how they should be named, based on the values of one or more of their attributes.
To activate this, first insert as many additional parts as you will need in the group, using the Insert Part dialog from the shortcut menu.

Next, select Part Naming from the shortcut menu, or click in the top left cell of the grid and choose Change Part Name Rules from the drop-down list.

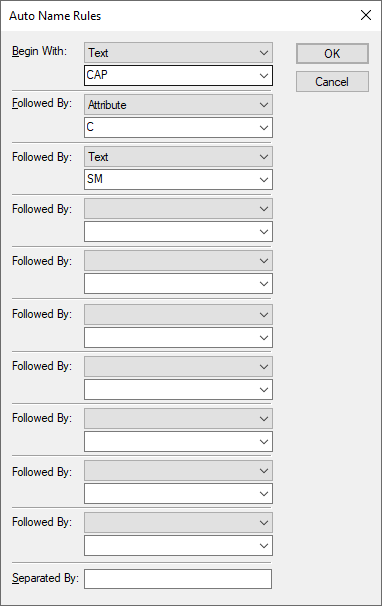
Now, specify the rules for how the parts should be named. You can choose up to four fields in constructing the name, together with any text separator you would like between the fields. In this example, the name starts with the text string “Cap”, then the value of the “C” attribute, and then the text “SM”. A separator ”/” has also been specified, and will be inserted between each of the fields.

On returning from this dialog, the top left cell of the grid will be changed to “Auto Name Parts” to show how the parts are named, and the actual part names will be reconstructed using the rules specified. In this case, each capacitor gets its name from the text items we have defined, together with the attribute which specifies its value.

For Auto-Named Parts, the names will always be automatically updated whenever any of the attribute values are changed. As with Manually Named parts, each part name must still be unique; this will be checked when you attempt to save the part group back into the library.
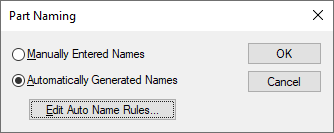
From the Edit menu, you can also select the Part Naming mechanism when starting a new part using the Part Naming option:

Drag and Drop
As well as using the explicit commands to manage attributes, you can also drag and drop a list of attribute settings onto the Attributes page. You can either drop one or more files onto the page, or a section of text from another application.
To be recognised as a list of attribute settings, the application will look for Name=Value pairs. Any line of text that does not contain the Equals sign as a separator will be ignored.
This is an example of some text that you could use to add some attributes to a Part:
Mfr=Avent
Value=10ns
Tolerance=5%
Class=
Status=Live