Used to insert a spiral in the design. Spirals can be in the form of a Track, a Copper Shape or a Documentation Shape. Spirals can also be added to a Footprint in the footprint editor.
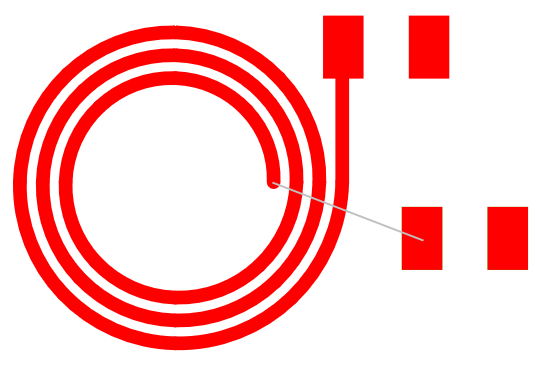
An example Spiral Track:
Shortcuts
Default Keys: None
Default Menu: Insert
Command: Insert Copper Spiral
Default Keys: None
Default Menu: Insert
Command: Insert Track Spiral
Locating this option
Available from: Insert menu > Copper Spiral option
Available from: Insert menu > Track Spiral option
How To Insert a Spiral
To insert a spiral use the Insert Copper or Track Spiral commands. The operation of these commands is very similar. In a footprint, the Insert Track Spiral command will insert a spiral shaped Breakout.
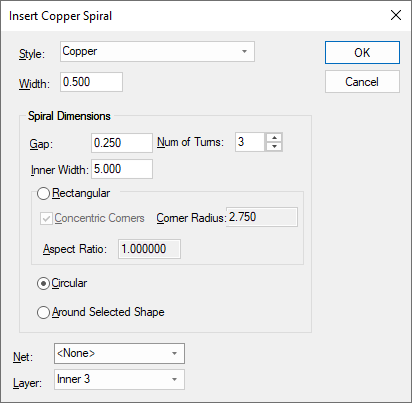
When you use these commands, you will be presented with a dialog. Select the required parameters and press OK to process them.
Selecting the option Around Selected Shape will act differently compared to Rectangular or Circular, see below for further information.
Rectangular and Circular Spirals
After pressing OK, the spiral shape will appear on the cursor and you can place the spiral where you want. If the spiral does not look correct, you can cancel the operation. This will return you to the dialog and you can adjust the parameters. When placing a Track or Breakout, you can use the auto weld feature to connect the spiral to a pad or via as you place it. You can Rotate or Mirror the spiral as you place it.
A spiral may be edited after being placed by selecting the Edit Spiral command from the context menu when a spiral is selected. This will open a dialog which is similar to the one shown when creating a new spiral, however the layer and net cannot be changed through this dialog. Select the required parameters and then press OK to modify the spiral to have the new parameters. Alternatively a spiral can be double clicked to open the Edit Spiral dialog.
Net
Select the Net to connect the spiral to. For Tracks you must select an existing net, but Copper does not have to be on a net.
Layer
Select the layer to place the spiral on.
Style
Choose the style to use or type a Width.
Spiral Dimensions
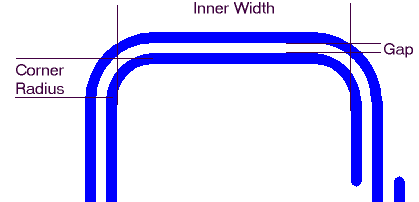
The spirals always begin at the inner right side and end at the outer right side (but you can Rotate or Mirror whilst placing).
The Gap is the distance between each turn of the spiral excluding the segments Widths.
The Num of Turns is the number of complete loops of the spiral.
The Inner Width is the distance across inner void of the spiral.
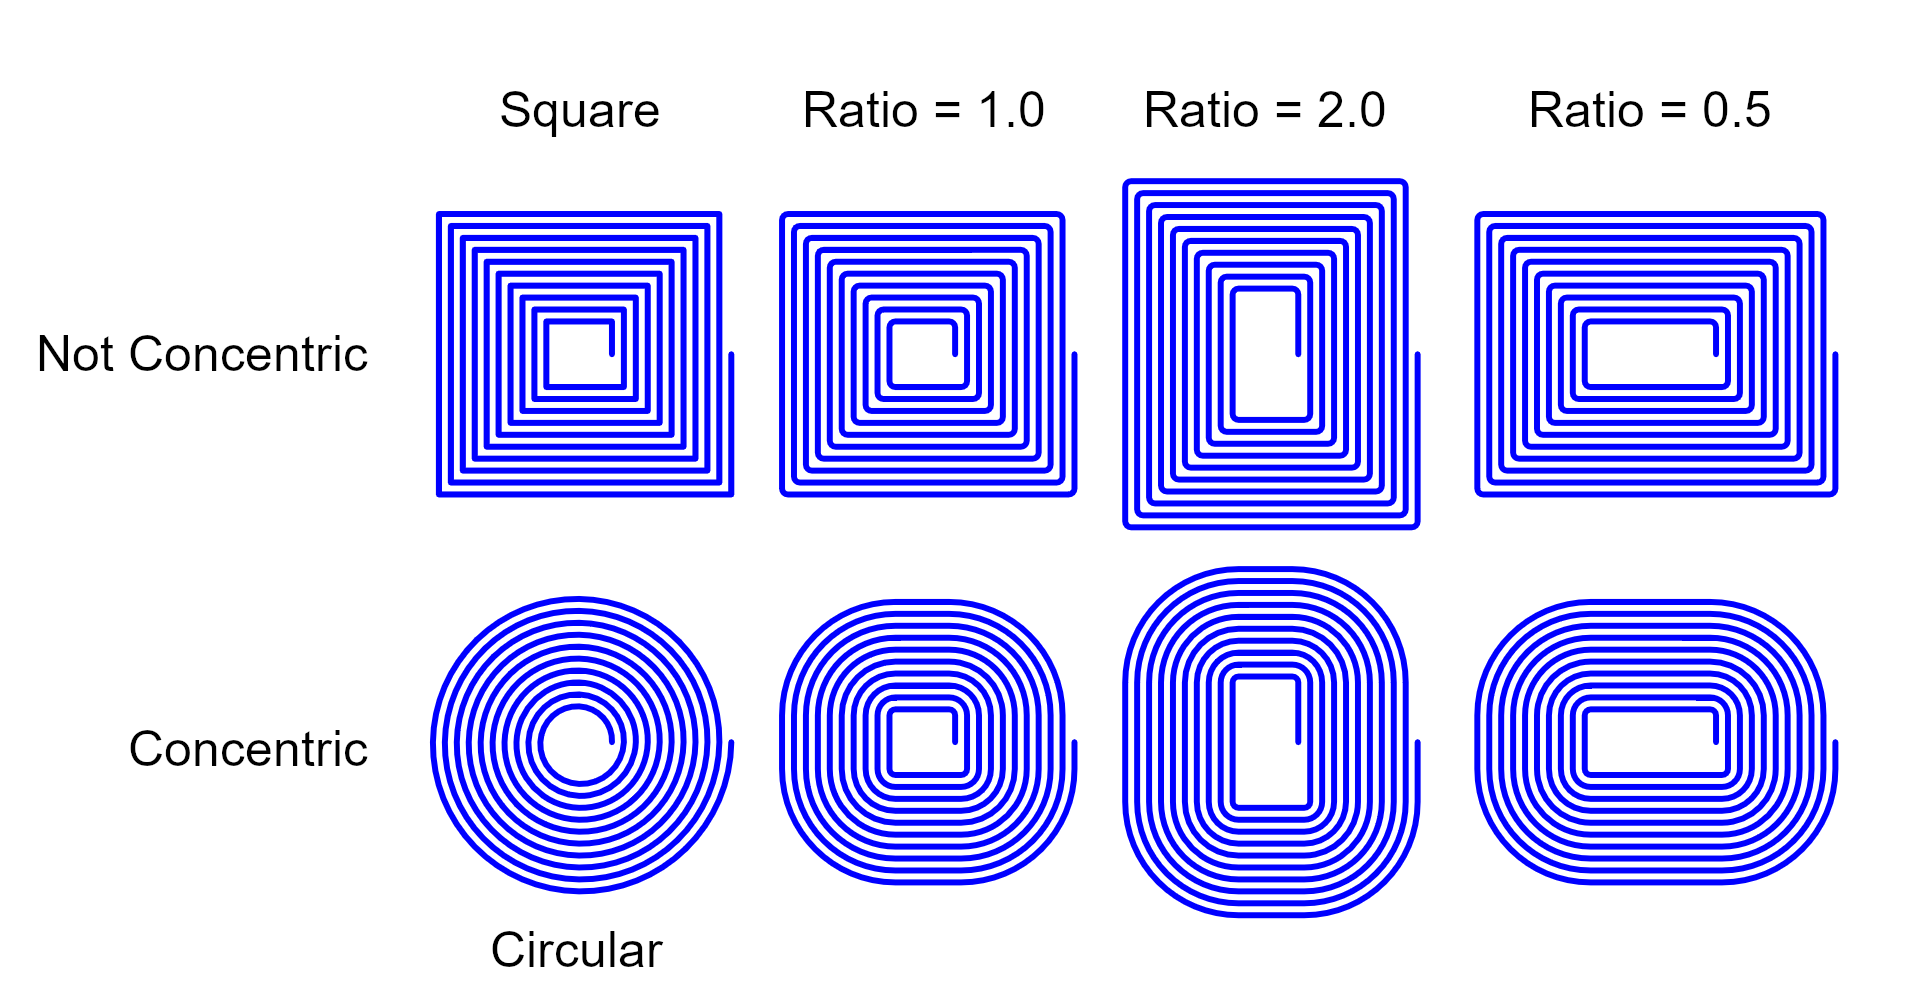
The Aspect Ratio allows you to create rectangular spirals and is the ratio of Height / Width. So, an Aspect Ratio > 1.0 gives a tall spiral, and < 1.0 gives a Wide spiral.
The Corner Radius is the initial inner radius of the corners of the spiral.
Concentric Corners gives tight corners which are properly nested, increasing in radius as the number of turns increases. Otherwise the corners are fixed at the Corner Radius.
The Circular option creates an archimedean spiral. A zero Corner Radius and not Concentric Corners gives square corners.
Examples
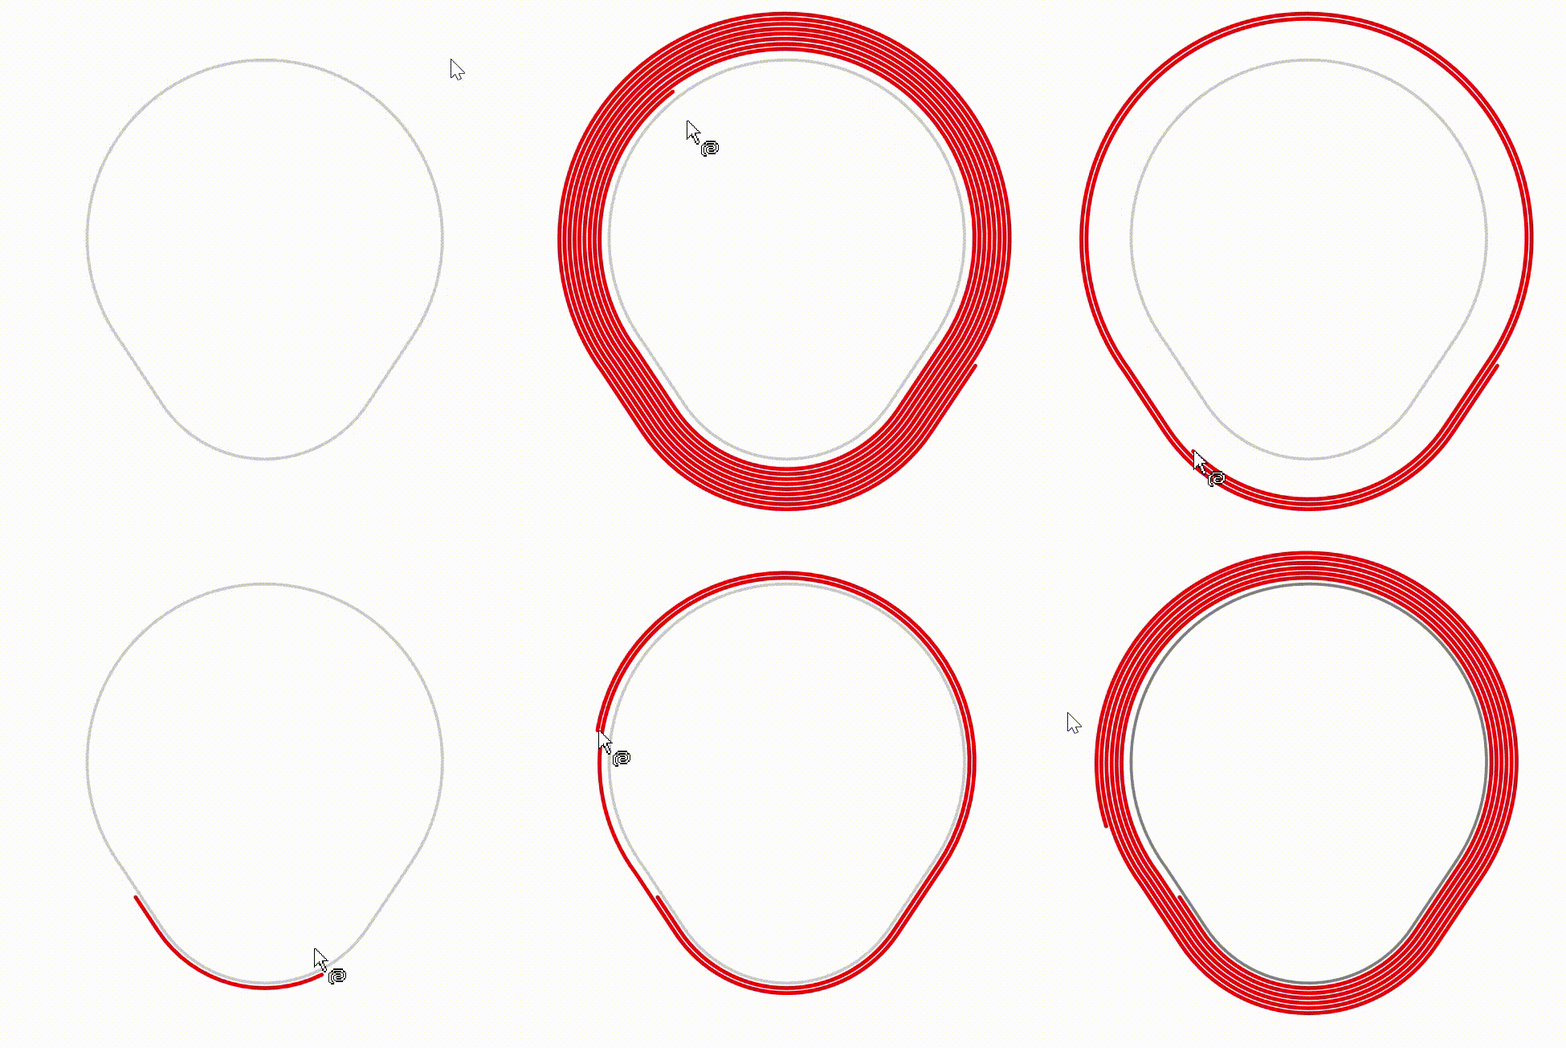
Around Selected Shape Spirals
After pressing OK on the Insert Spiral dialog, the dialog will disappear from view and you will be able to hover over items in your design. If a suitable shape is available, the cursor will change to show the spiral symbol, otherwise, the cursor will turn to an X. A shape is typically invalid for a spiral if it’s not closed.
You can change shapes to be Closed using Properties of the selected shape.
You can also spiral around pre-selected shapes. Select a shape you want to spiral around, and enter the spiral dialog through the insert menu.
Defining the start and end of your spiral
After you have selected a shape, the spiral will be generated based on the parameters
from the insert spiral dialog. At this point, you will be able to select a starting
point for your spiral, this will be based on the closest point from your cursor to
the spiral. Left click on your mouse to confirm the starting point and move on to
define the end point.
You define the end point in the same way as you define the
start point, move your cursor around and the spiral will be adjusted on the fly. The
end point will not go beyond the number of spirals you chose in the spiral dialog.
If you want to change the starting point after placing it, you can right click and select the Change Spiral Start Point from the context menu. Similarly, if you want to change the shape you are spiralling around, whilst selecting the start point you can right click to open the context menu and select Choose Another Shape, otherwise you can press Escape to return to the insert spiral dialog.
After selecting the end point, you will exit the Insert Spiral mode and your spiral will be available to be edited in the same way as any other circular or rectangular spiral. You can still edit the spiral parameters at this point if you want. Double-click the spiral or choose the Edit Spiral option in the context menu. This enables you to change the number of turns, gap size or inner width, or change the spiral type into a circular or rectangular shape.
Spiral Dimensions
The Gap is the distance between each turn of the spiral excluding the segments Widths.
The Num of Turns is the number of loops of the spiral.
The Inner Width is the distance at which the spiral should start, away from the base shape.
Example
Related Topics
Insert Copper | Insert Track | Change Track Style | Insert Wave | Insert Spline